TS18 Stuck on Logo or Boot Loop After a Wrong Flash? Here’s the Complete Unbrick & Recovery Guide
Typical symptoms: frozen on the car/brand logo or restarts every 20–60 seconds. Root cause: the TS18 firmware has multiple branches (1.1/1.2/2.2, WINDOW/THEME, portrait/landscape, 2K vs 1080p). Cross‑flashing across branches or resolutions bricks the unit. This guide helps you identify the exact branch and recover safely via USB/force flashing. This TS18 unbrick guide covers TS18 stuck on logo, TS18 boot loop fix, and other Android head unit boot loop scenarios. If you landed here after a TS18 wrong firmware flash, you’re in the right place.
1) Recognize the Problem
Common signs after a wrong flash:
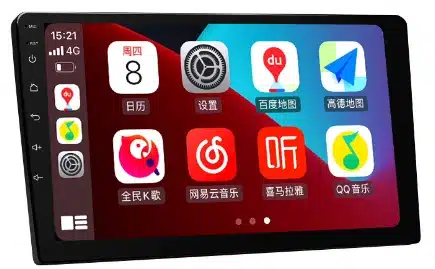
- Stuck on the car/brand logo; never reaches the launcher.
- Endless reboot loop (restarts every 20–60 seconds).
- Black screen with backlight on, or no backlight at all (hard brick).
- In rare cases it boots but touch is dead or the picture is scrambled — usually a resolution/touch driver mismatch.
2) Why the TS18 Bricks Easily: the Firmware Branch Map
TS18 isn’t a single monolithic firmware. It’s a multi‑branch family split by hardware platform, screen resolution, orientation, and UI packaging—across TS18 firmware branch 1.1/1.2/2.2 variants. Cross‑flashing (e.g., 2K ↔ 1080p, portrait ↔ landscape, WINDOW ↔ THEME, or 1.1/1.2/2.2) is the #1 reason for bricking.
2.1 Hardware platform
- UIS8581 vs UIS7862: kernel, drivers, and partition layouts differ. Never cross‑flash between platforms.
- Board vendor spin: same SoC, different codec/CAN/amplifier drivers baked into the package.
2.2 Screen system & resolution
- 2K (e.g., 2000×1200 / 1920×1200) vs 1080p/1280×720 (TS18 2K vs 1080p firmware): panel timing and touch calibration are tightly coupled.
- Panel buses: LVDS vs eDP; different DSI lanes and timing tables.
2.3 Orientation & UI packaging
- Portrait vs landscape (TS18 portrait vs landscape firmware) builds; some sub‑branches hard‑code rotation early in boot.
- WINDOW vs THEME (TS18 WINDOW vs THEME): different resource/launcher packaging; may boot but break UI and inputs.
2.4 Major branches: 1.1 / 1.2 / 2.2
- Major bumps often change partitions or driver stacks; treat them as incompatible a menos que el vendedor confirme explícitamente las rutas de actualización.
3) Capture su “huella del modelo” (identificación exacta)
Antes de la recuperación, capture una huella completa digital de su TS18. El objetivo es encontrar un firmware que se ajuste a cada dimensión anterior.
3.1 Campos del sistema (si la interfaz de usuario aún es accesible)
- Acerca del dispositivo → modelo, SoC, versión de Android, número de compilación, resolución, fecha del kernel.
- Haga una copia de seguridad de los metadatos de compilación actuales (fotos/capturas de pantalla). Este es su punto de anclaje para la reversión.
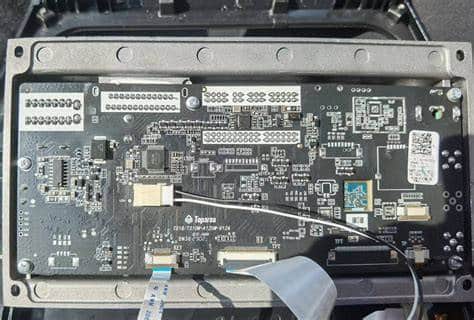
3.2 Serigrafía y etiquetas de la placa (si el desmontaje es posible)
- Fotografíe ambos lados de la PCB; registre el código de la placa y la revisión de la PCB.
- Anote los chips de amplificador (TDA/825x), radio (TDA7708) y DSP utilizados.
3.3 Pantalla y táctil
- Etiqueta del panel (resolución, proveedor, temporización). Problema: 2K mal etiquetado como 1080p, o viceversa.
- Modelo del IC del controlador táctil (por ejemplo, Goodix/FocalTech) — crucial para la recuperación del táctil.
4) Tres rutas de recuperación (riesgo bajo → alto)
Comience siempre con la ruta de menor riesgo que se adapte a su situación.
Ruta A — Retroceso OTA/SD Card (si Recovery es accesible)
Úselo solo si aún puede entrar en Recovery de fábrica y tiene un paquete exacto, conocido y verificado para su rama.
- Copie el paquete de actualización exacto (ZIP) a la raíz de una SD/USB FAT32.
- Ingrese en Recovery (Power + Restablecer o combinación de teclas del fabricante) y elija Aplicar actualización.
- Después de flashear, no restablezca de fábrica inmediatamente; verifique primero la pantalla y el tacto.
Ruta B — Flash forzado por USB (mayor tasa de éxito; normalmente borra los datos)
Ideal para dispositivos atascados en el logotipo. Requiere una PC, un cable con capacidad de datos y un conjunto de imágenes que coincida con su rama (paquete scatter/partition).
- Instale el controlador/herramientas según la plataforma (use controladores firmados en Windows).
- Cargue el mapa de particiones correcto y habilite verificación de suma de comprobación.
- Conecte la unidad en modo de descarga; si no se detecta, pruebe los pads de descarga forzada de la placa.
- Flashea en la secuencia recomendada por la herramienta (por ejemplo, bootloader → kernel → system → vendor → dtbo); don’t skip verified partitions.
Path C — Board‑Level Force (Maskrom/short pads)
Last resort for hard bricks. You’ll open the unit and short designated pads to put the SoC into the lowest‑level download mode.
- Disconnect vehicle power; bench‑power the unit with a stable supply.
- Short the vendor‑documented pads while plugging in USB; release after the PC detects a new device class.
- Flash a minimal bootable set first; verify panel/touch before optional partitions.
5) USB / Force Flashing — Practical How‑To
Below is the standard TS18 USB flash workflow.
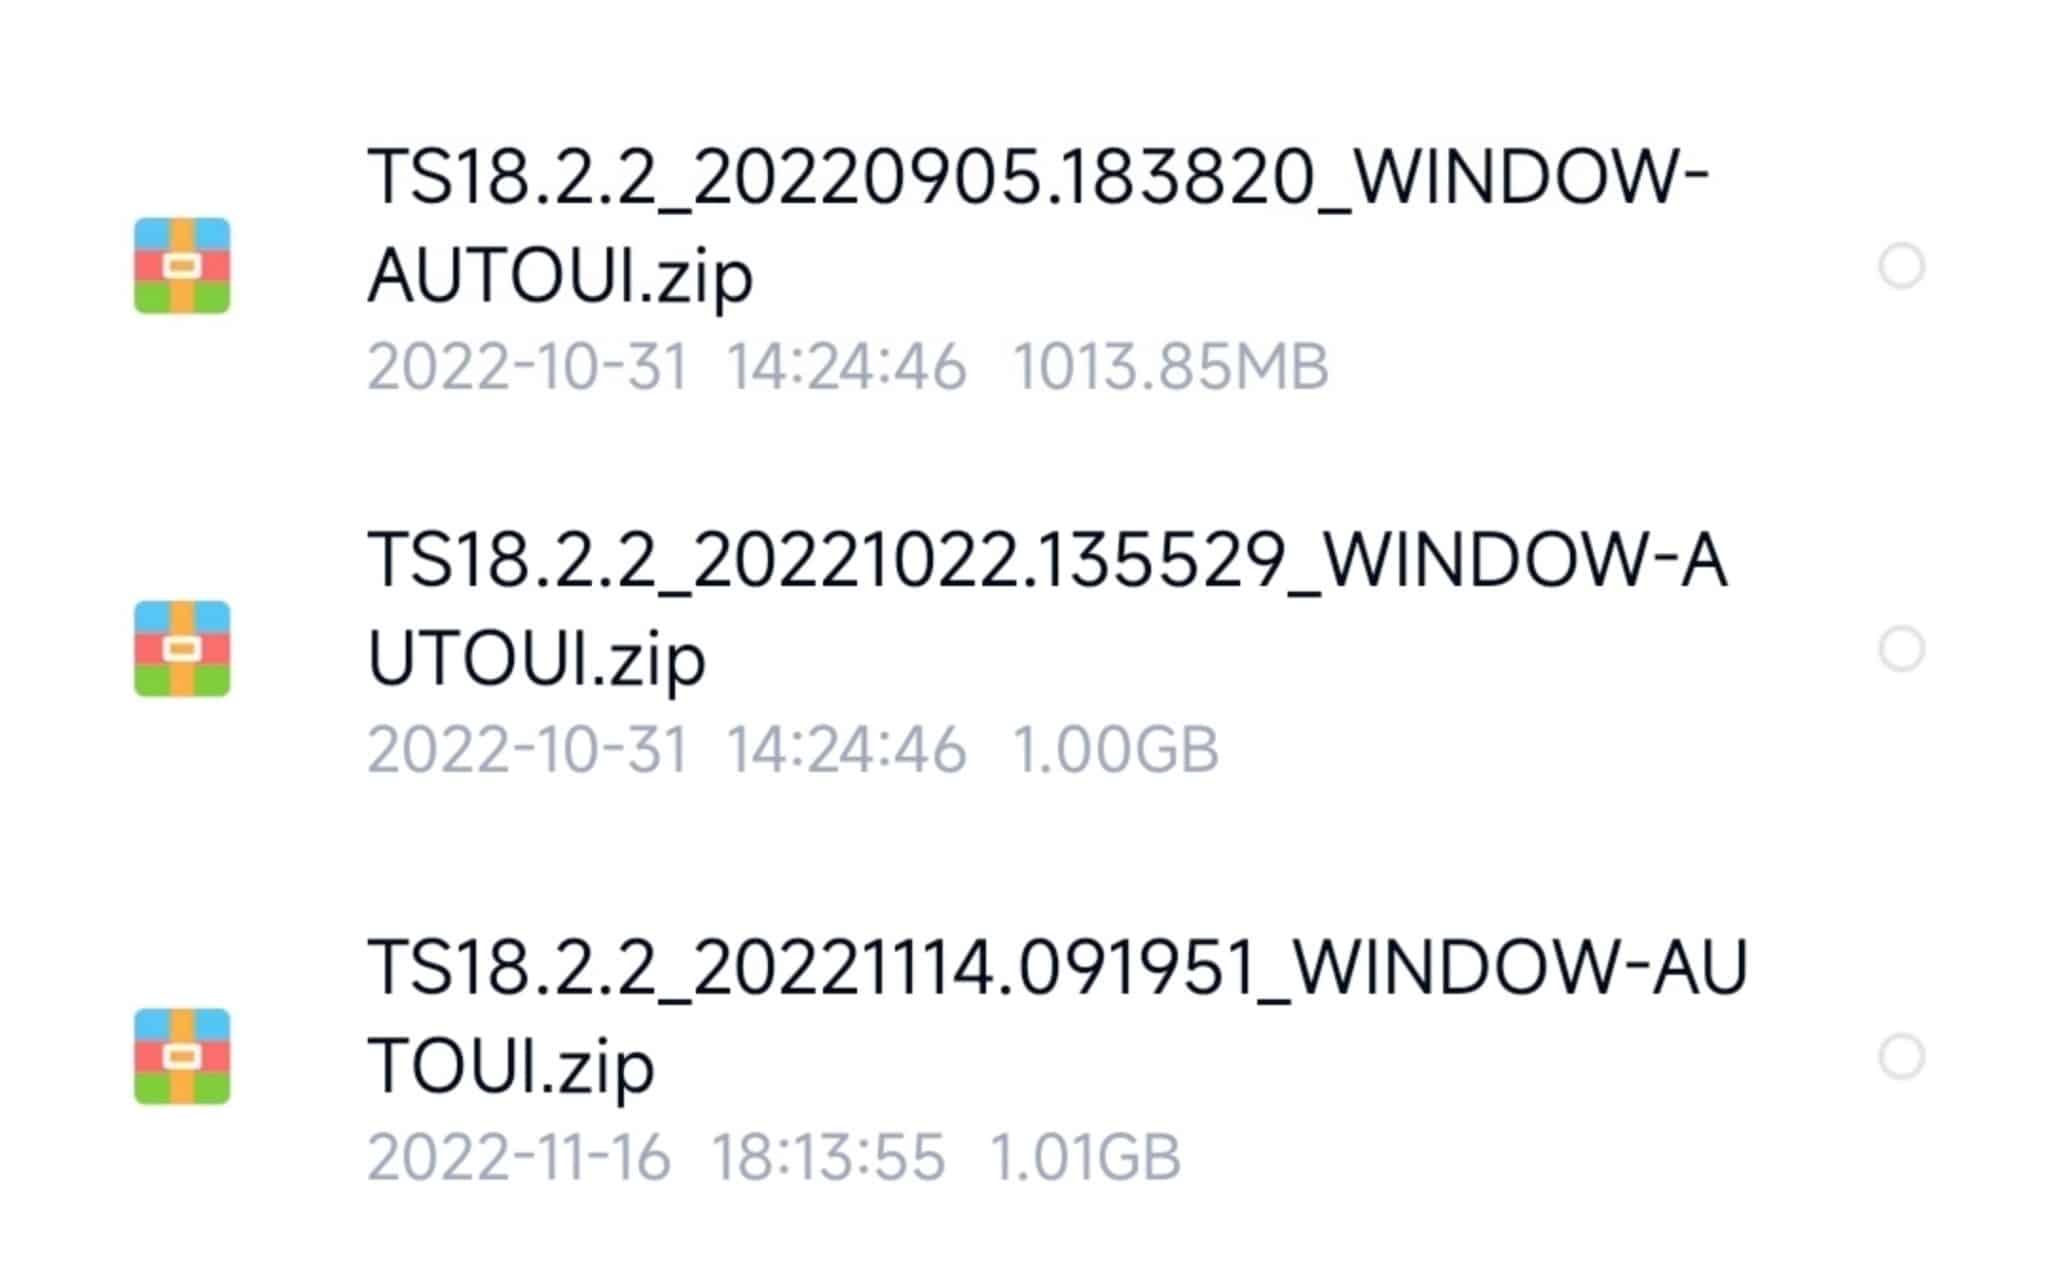
5.1 Choose the right image set
- Match all five axes: platform (UIS8581/UIS7862), resolution (2K vs 1080p), orientation (portrait/landscape), UI packaging (WINDOW/THEME), and major branch (1.1/1.2/2.2).
- Prefer signed or checksum‑verifiable images; record MD5/SHA256 before flashing.
5.2 Cabling & power
- Use a short, known‑good data cable; avoid hubs. A stable 12V bench supply is recommended.
- ESD matters; don’t hot‑plug CAN/camera harnesses during flash.
5.3 Typical tool sequence (abstracted)
- Install drivers → reboot PC if required.
- Load firmware scatter/partition layout → enable checksum.
- Press Download/Flash → enter download/Maskrom mode.
- Wait for a full verify pass → power cycle → first boot usually takes 2–5 minutes.
5.4 Common errors & remedies
| Symptom / Error | Causa probable | What to try |
|---|---|---|
| Tool doesn’t detect device | Wrong mode, bad cable, missing driver | Try Maskrom/short pads; swap cable/port; reinstall driver |
| Checksum failed | Corrupt download or wrong package | Re‑download; verify MD5/SHA256; confirm branch match |
| Flashes fine but black screen | Wrong resolution/panel timing | Switch to panel‑matched image (2K vs 1080p; LVDS vs eDP) |
| Boots but touch is dead | Mismatched touch driver | Use image with correct Goodix/FocalTech driver; or patch vendor |
| Boot loop after logo | Vendor/system mismatch or wrong dtbo | Re‑flash dtbo/vendor pair for your branch; avoid mixing versions |
| No audio / noisy radio | Codec/amp driver mismatch | Use a build for your exact board spin (amp/radio ICs) |
6) Post‑Flash Validation & CAN Setup
6.1 Visual & input checks
- Resolution: crisp output, no scaling artifacts; correct orientation.
- Touch: full‑panel response, no inverted axes or dead zones.
6.2 Audio, camera, and radio
- Play a local file; confirm balance/fade; check DSP presets.
- Reverse camera; verify guidelines and latency.
- FM stability (e.g., TDA7708 + RDS) validated while driving.
6.3 CAN & vehicle integration
- Enter Factory / CAN settings; select the correct brand/model/year.
- Test steering‑wheel keys, door status, and A/C overlay. A wrong CAN profile often looks like a “firmware bug.”
6.4 Backup & future policy
- Export a full settings backup (if supported) and photograph the build page.
- Upgrade only within your confirmed branch; keep a copy of this working image and its checksums offline.
7) Quick Fix Matrix
| Observed symptom | Branch signal | Verify | Acción |
|---|---|---|---|
| Logo → boot loop | Likely vendor/dtbo or cross‑branch mismatch | Compare build date vs branch; diff vendor files | USB‑flash a branch‑matched vendor + dtbo |
| Black screen (backlight on) | Wrong panel timing/resolution (2K ↔ 1080p) | Check panel label/resolution | Switch to the correct resolution image |
| Boots but touch dead | Touch driver mismatch | Identify the touch IC | Use firmware that matches the touch IC |
| No audio / CAN overlays wrong | Wrong CAN profile / codec | Check CAN brand/year, codec IC | Select the correct CAN profile; match codec build |
8) FAQ — TS18 Wrong‑Flash & Recovery
Q1. Can a vibration‑only, no‑display unit still be saved?
Normalmente sí, mediante Maskrom/force mode, siempre que el SoC se enumere por USB. Las fallas reales de energía/PMIC requieren reparación de la placa.
Q2. I can enter Recovery. Should I factory‑reset first?
No. Prueba primero una reversión que coincida con la rama. Restablecer antes de flashear no puede solucionar un desajuste entre ramas y puede borrar los registros que necesitas.
Q3. A friend’s firmware boots on their TS18 but bricks mine. Why?
Same “TS18” label, different branch. Your panel, touch, or vendor stack differs. Treat each unit as unique until proven identical.
Q4. Can I flash 2K on a 1080p panel for “better quality”?
No. Panel timing must match. Wrong resolution typically yields a black screen or garbled output.
Q5. USB flash vs Maskrom: which is better?
USB flash es menos invasivo y suficiente para la mayoría de los soft bricks. Maskrom es para hard bricks — más potente pero más arriesgado.
Q6. Touch is still dead after a “successful” flash.
Vuelva a comprobar la familia del IC táctil. Muchas imágenes del proveedor son idénticas excepto por los controladores táctiles. Use la imagen etiquetada para su controlador.
Q7. After flashing, there’s no sound or the radio is noisy.
Probablemente una incompatibilidad de códec/amp o del controlador de radio. Use una compilación dirigida específicamente a la revisión exacta de su placa (IC del amplificador, modelo del sintonizador).
Q8. Will flashing erase activation or paired features?
Depende del proveedor. Haz una copia de seguridad de todos los ID/keys. Una vez que tengas acceso a la interfaz de usuario, migra los datos bajo orientación.
Q9. How do I keep this from happening again?
Mantenga una carpeta del dispositivo: fotos de la placa, la etiqueta del panel, el IC táctil y la pantalla Acerca de; almacene su imagen conocida como buena y las sumas de verificación.
Q10. When should I stop DIY and seek help?
Deténgase después de dos intentos fallidos de flasheo o si las almohadillas Maskrom no están claras. Un rescate profesional reduce el riesgo de dañar la PCB.
9) Resources & Internal Links
- Remote repair & unbrick service: FixMyDash — Repair Car Android
- Homepage & contact: FixMyDash.com
- Product insights & tutorials: CarMP5.com
- Premium in‑car systems (reference): Ikagoo.com
10) Safety & Legal Disclaimer
This guide is for technicians and experienced hobbyists. Disassembly and board‑level operations carry risk of injury and equipment damage. Always disconnect vehicle power, observe ESD precautions, and comply with local regulations and warranty terms. Use only firmware you are licensed to use. If you are unsure, book professional service.